
You have definitely seen it somewhere, in your sister’s bathroom, on the ceiling of a living room in a decoration magazine, on the wall of the dining room at your friend’s house … this year, the shiplap is everywhere!
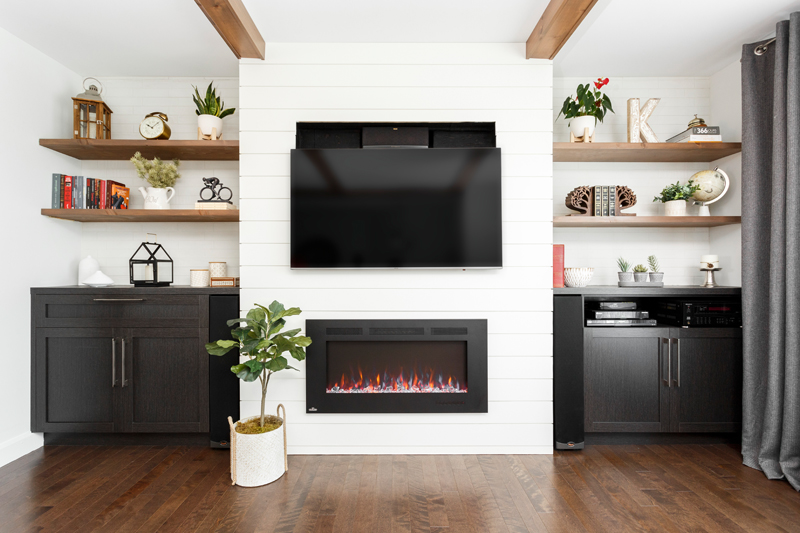
This decorative element is highly appreciated because it is both minimal and simple, but it also adds great interest and texture to any room. In addition, it offers the possibility to create different looks using the same material because it can be installed horizontally or vertically and can be found in several rooms of the house. The shiplap can also be used to create small accent features or to cover entire rooms. In short, the possibilities are endless!
Where to start?
The first step is to choose the shiplap for which you have a crush and which will match your décor the best. What you need to know is that the thicker the paneling, the deeper the spaces between the two planks and the more obvious the boundary between the planks will be. Here are some suggestions:
⇒ 2010 V-Groove, available in white primed MDF
⇒ 8021 Shiplap, available in white primed MDF or in select pine
⇒ 2047 Shiplap, available in white primed MDF
⇒ 0761 Shiplap, available in white primed MDF or select pine
Laying the boards
The second step is to visualize the effect you want to create. You have to think about how you are going to lay the boards in order to find the most symmetrical or the most aesthetic pose. In general, the majority of walls or ceilings will not fit perfectly with solid planks. So, for example, if your wall is 114 ″ wide and your shiplap boards are 5.5 ″ wide, that means you can install 20 full boards (covering 110 ″), but you have 4 ″ left to cover, which means you will need to use a table saw to cut that last board to the correct width. Planning ahead allows you to choose exactly where you are going to have those uneven planks.
One option is to simply leave the side pieces smaller than the others or you can center all the boards so that you have evenly smaller pieces at both ends. These are things you need to think about before installing the shiplap. If you’re laying shiplap on a wall, consider whether you want a full plank to start at the top or bottom.
Also consider which parts of your shiplap (if any) will be covered by baseboards or o’gees, as this will impact the amount of boards visible. Note: When doing your calculations, remember to include the gap between the boards!
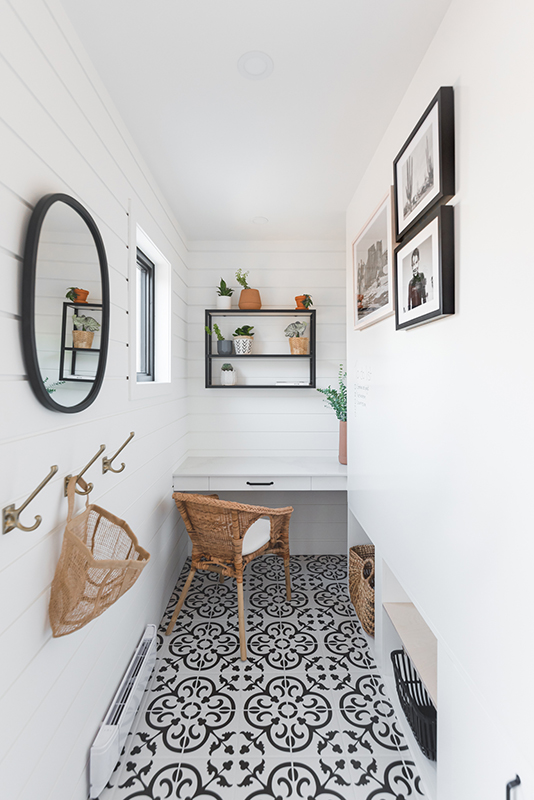
Credit photo: Photographie Atypic
Think about the joints
If you are covering an area that is longer than the length of your shiplap board, you must hide the joints if you want to create the look of a single board. Try to plan where these joints will be in order to vary them on your wall. This will allow you not to end up with a line of joints in the same place and create a more beautiful effect. In addition, it is better to provide that the joint is always on a post so that you can nail the two ends of the two boards, butting side by side in the post (if you do not do this, they may tilt towards the end). outside and your joint will be more visible). So it’s worth doing this even if you end up losing a bit of length on your board.
Calculate boards needed for the project
The last stage is one that many dread; calculate how many boards you will need to complete your project. To begin with, you need to know how many square feet a pack of shiplap covers. This information is normally found in the product details whether you are shopping online or directly on the box. Consider calculating additional boards. When calculating how much shiplap you will need for a given project, it is recommended that you add about 10% more for waste – better to have too much material than to run out! Then, you have to calculate the square feet that you are going to cover, without forgetting the additional 10%. For example, for a wall 10 feet by 8 feet, you need to cover an area of 88 square feet (80 plus 8 feet of supplements). So, if a package covers 13.68 square feet, you will need 7 boxes (88 divided by 13.63, rounded).